Personalisation in Adobe Campaign Standard
Before sending out just another email, consider these areas of personalisation for the best customer experience. In this guide, you’ll learn how to personalise each part of your email using Adobe Campaign Standard (ACS). The personalisation areas covered include:
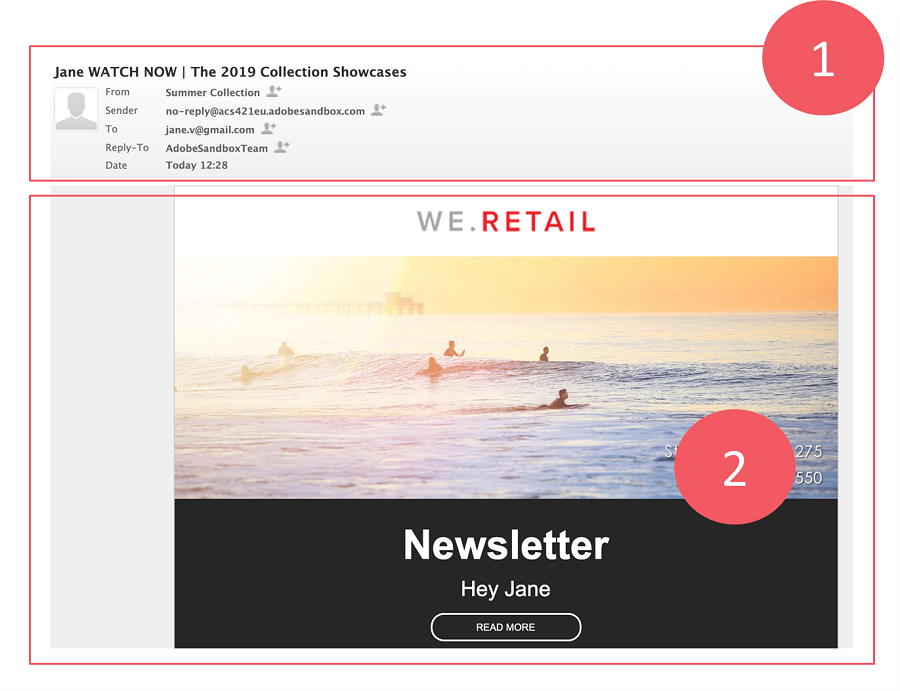
- Header: Sender name and Subject line
- Content: Personalised fields and content based on segments, gender, location, or product recommendations, using Dynamic Personalisation fields and Predefined Personalisation Fields
Personalise the sender name
To ensure brand consistency across communications channels and customer recognition it is important to personalise the sender’s name appropriately.
The default sender name block is automatically entered in the field. The default sender email address and sender name are defined in Brand Configuration. Sender appears in the header section. It is a mandatory field so this must not be empty and the email won’t send unless the email address is valid.
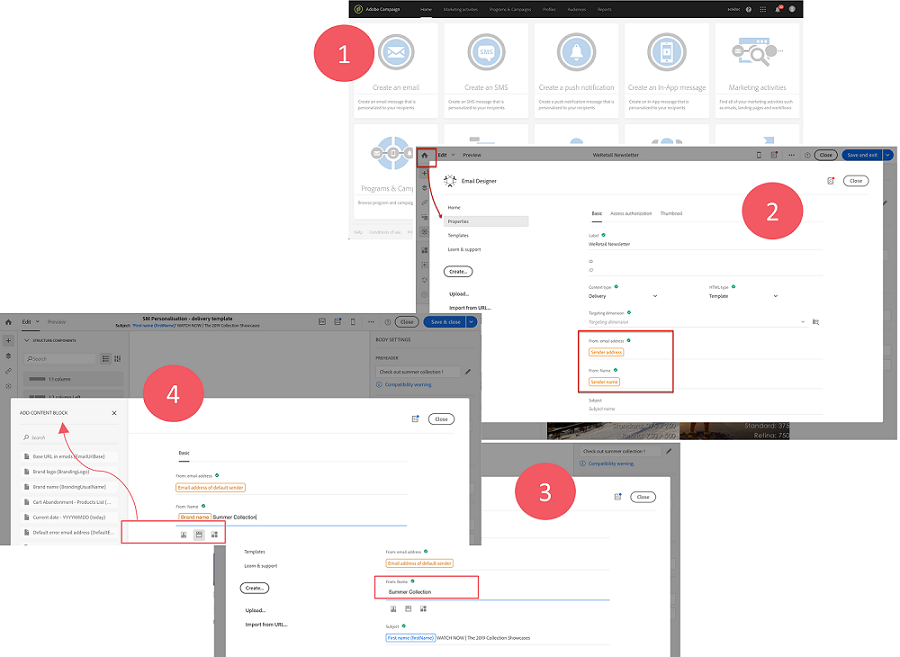
- Create an email.
- Inside Email Designer, click on the Home icon > Go the Properties tab of the Email Designer home page.
- Click the Sender Name block, this editable field allows you to enter the name you would like to use.
- The field can also be personalised depending on the customer. To do this, you can add personalisation fields, content blocks and dynamic content by clicking the icons below the sender name. The personalisation values should be set up prior to this stage.
Personalise the subject line
The subject line will appear in the header section with sender name. Similar ideas apply here and it is important to make the subject line relevant to the customer receiving it. If the subject line is empty, a warning is displayed in the message dashboard and in the Email Designer.
To personalise the subject line which will appear in the header of messages sent:
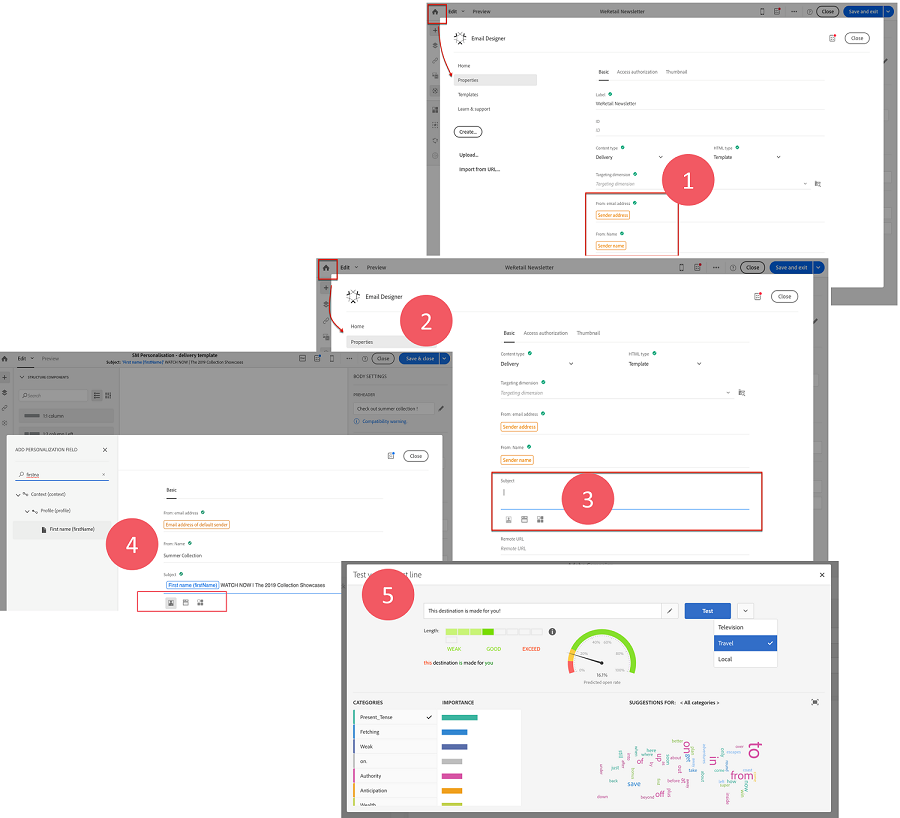
- Create an email.
- Inside Email Designer, click on Home icon > Go to the Properties tab of the Email Designer home page.
- Click on the subject section and fill in desired subject line
- To add personalisation fields, content blocks and dynamic content to the subject line, click the corresponding icons in the red square. In this example, “First Name” was selected as part of subject line personalisation.
- To get an estimation of your email open rate based on your subject line before you send it, click the Test Subject button to access the Test Your Subject Line window> Select the model for the open rate prediction corresponding to your industry> Click Test. The test subject feature is disabled by default. It is enabled when the industry specific model is imported. For help with this feature, get in touch!
Content – Dynamic Personalisation Fields
There are many benefits to using personalised email content such as setting up automated, personalised emails to be triggered according to customer behaviour, or presenting specific types of information to different customer personas. To insert a field from the database into your email content such as the profile’s first name:
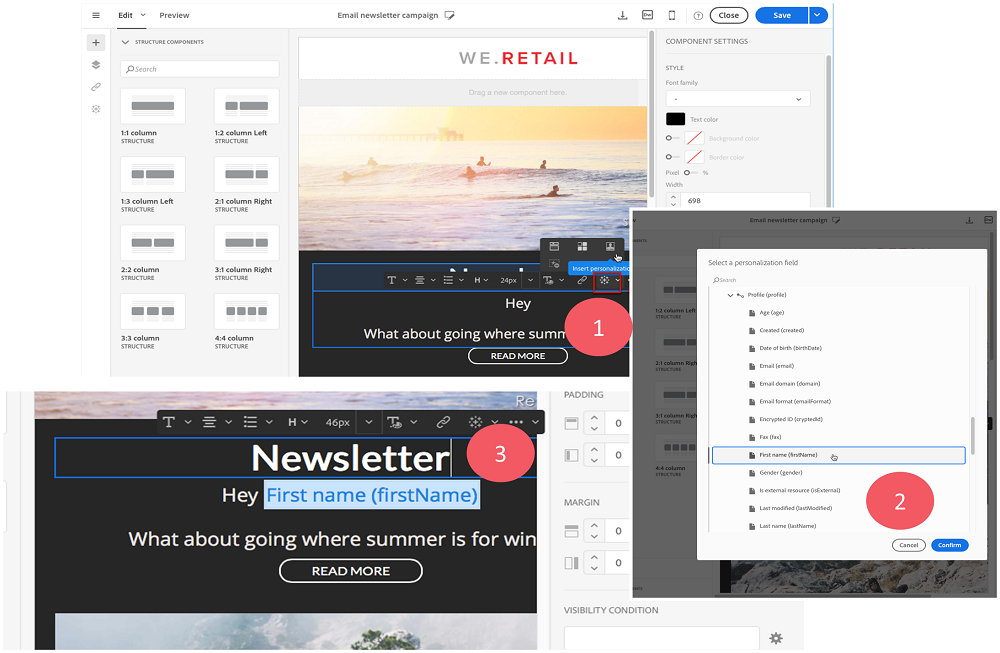
- Inside Email Designer> Click inside a text block where the personalisation is needed> Click the Personalise icon > Select Insert personalisation field
- Select the personalisation field from profile database that will popup
- Confirm> the selected field is highlighted and appears inside text block.
- The actual value from the targeted profile gets generated and can be viewed prior to the send using previewing and preparing the email.
Content – Predefined Personalisation Fields
Ensure that standard email elements that get used across the organisation are set up and consistently used for the best customer experience. These predefined personalisation elements preset all the fields that should be used as part of corporate branding and templates. This approach ensures brand compliance and consistency. These content blocks are dynamic, personalised, and have a specific rendering. For example, you can add a greeting or a link to a mirror page. To insert a predefined personalisation field:
- Inside Email Designer> Click inside a text block where the personalisation is needed> Click the Personalise icon > Select Insert content block.
- Select the content block that you would like to insert. The blocks available vary depending on the context (email or landing page).
- Click Save> The name of the content block appears in the editor and it is highlighted in yellow. It will automatically adapt to the profile when the personalisation is generated. There are many out-of-the-box content blocks from mirror page URLs to brand logos.
- Creating custom content blocks: Choose Resources > Content blocks from the advanced menu to access the list of content blocks > Click the Create button or duplicate a pre-existing content block.
- Enter a label > select shared block’s Content Type and Profile Targeting dimension > select the Depends on format option to create content for both HTML and text formats> enter the content of the content block(s) > click the Create button and the content block is now available for both messages or a landing pages.
Each content type option relates to a specific type of content.
- Shared: delivery or a landing page.
- Delivery: only for delivery.
- Landing page: only for landing page.
The targeting dimension enables you to define which type of message you can use the content block in. This is to prevent using inappropriate blocks in a message, which may lead to errors. If you leave this field empty, the content block will be compatible with all messages, no matter what the targeting dimension is. If you set a targeting dimension, that block will only be compatible with messages that have the same targeting dimension.

Personalisation is crucial for the best customer experience. For more information on how Purple Square could help you with this topic or anything else, get in touch today!
For full documentation on personalisation within Adobe Campaign Standard, visit the Adobe website.
Like what you see?
Subscribe to our newsletter for customer experience thought leadership and marketing tips and tricks.